I am on an online shop hosted by a very lovely person. She has amazing stones and jewels that were gathered by a gentleman over many years. He is now selling all of his lifetime finds. These checkerboard, double sided green amethyst jewels were one of the find posted on the site.
Having a softness for amethyst I looked at these lovely stones and couldn’t figure out what to do with them. I posted on the website and referenced a friend from Florida who I took classes with at the very beginning of jewelry journey. She suggested something and off I went! I had some time over the last few days and was able to make what I had envisioned. I really love the piece! Thank you Clara!! Thank you Vickie for providing the beautiful gems! Thanks to Sue Simon for started me on this path!
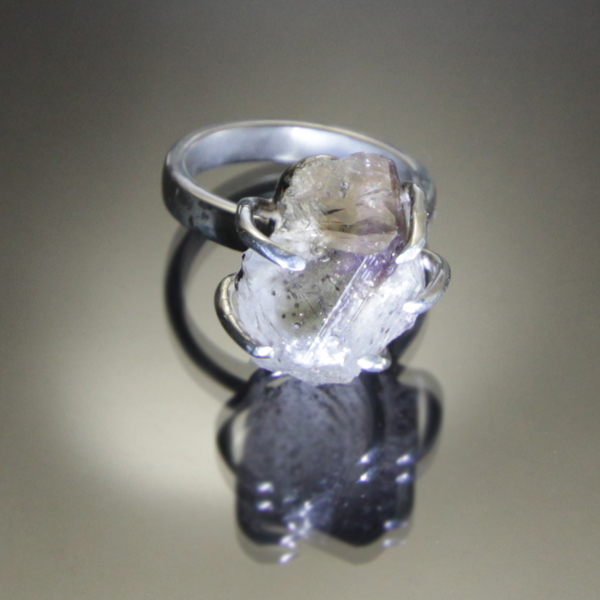
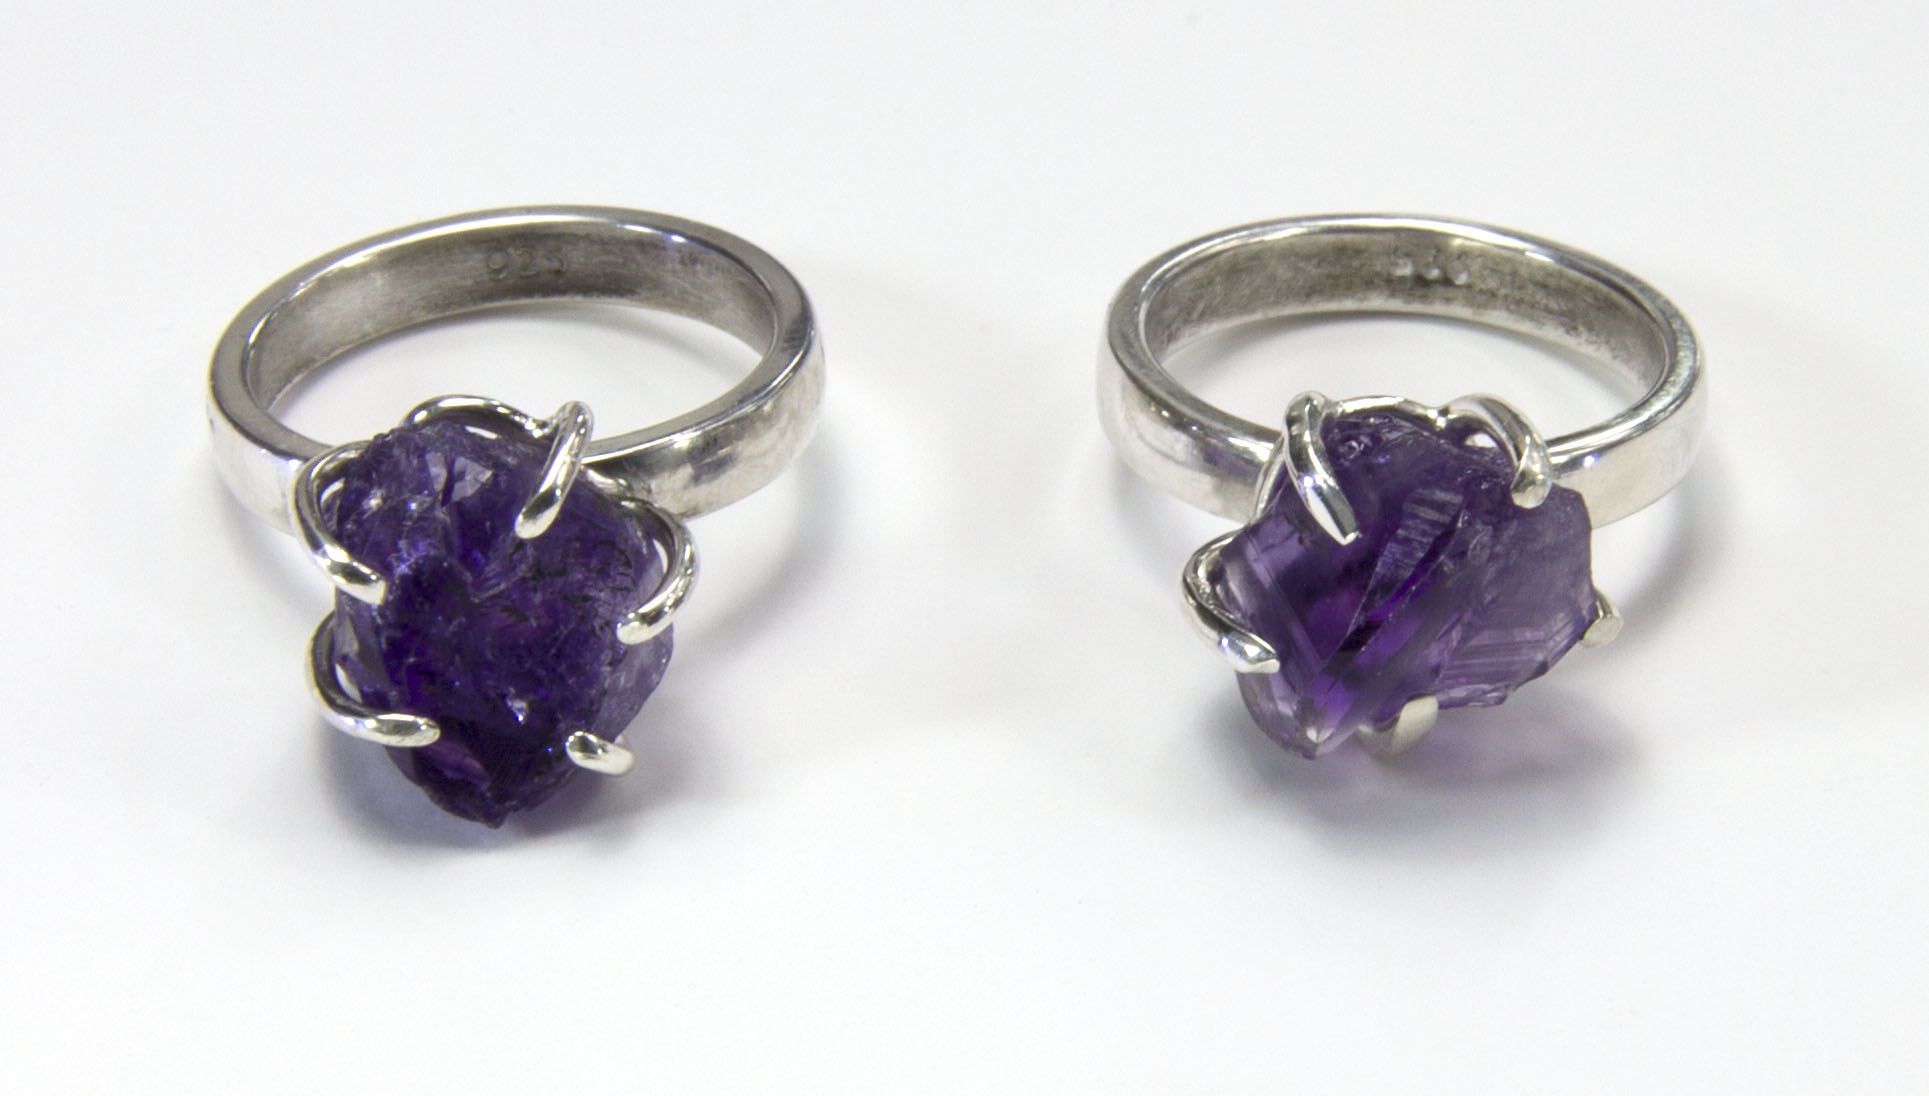
Several years ago I made a raw smoky quartz ring. I posted it on my Facebook page and in a matter of a few hours a friend from long ago inquired about the ring. I looked at the other raw stones I had and created the original amethyst ring and posted it on my website.
Fast forward to February 23, I was sitting on the couch having my coffee and checking my emails before getting ready for work. I saw an email from the prop master from CBS’s Under the Dome asking about the amethyst ring on my website and explaining it would be for season 3 of the TV show. I also saw an email from Etsy that was sent several hours later from the same person about the same ring. I ran upstairs and showed Alan the emails, he looked the person up on IMDB.com. Yup, legit!! I emailed back and received a quick response, we talked on the phone about creating a deep amethyst ring and off we go!
Original Raw Amethyst Ring
The interesting thing was, I had a person about a month earlier ask about the same ring but wanted deep amethyst. I sourced the deep amethyst and hedging my bet I purchased 5 different deep amethyst stones. I let her know I had the stones and she vanished, never to be heard from again. Thanks to that person because now I had 5 hand-picked raw amethyst stones to use for the rings for Under the Dome.
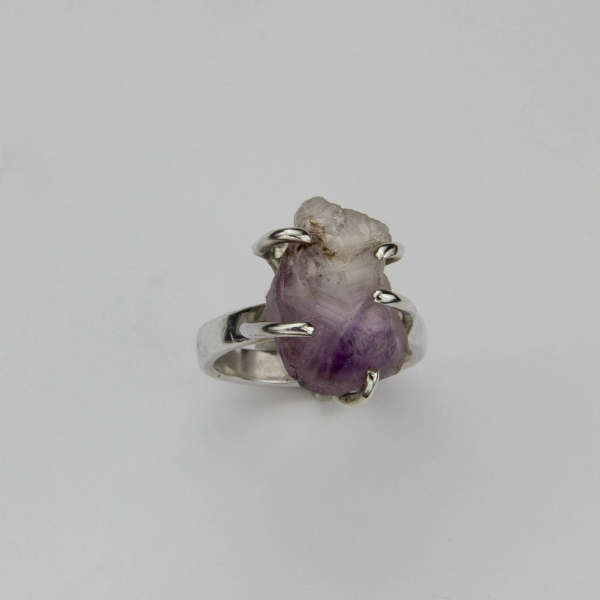
Under the Dome first set of deep amethyst rings
I sent photos of the stones to the prop master, he picked three stones so I made three in total and shipped them off. At this point it was very hard to be quiet but the whole thing needed to be secret until the launch of the show and the ring was actually on screen worn by Marg Helgenberger.
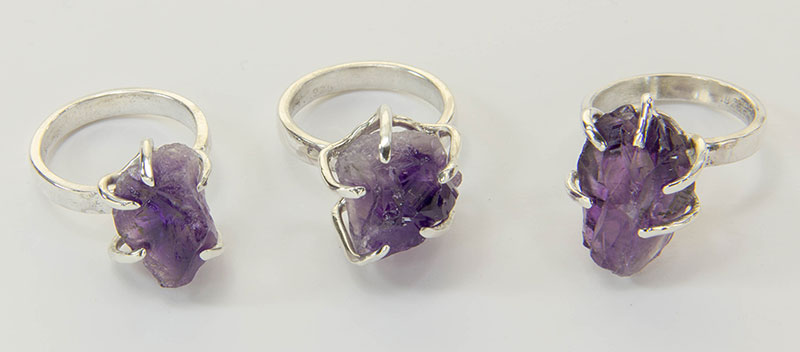
The second set of slightly smaller deep amethyst rings
It all happened very fast, it all was very easy and they ordered several more rings with smaller stones and requested some large raw amethyst stones for other scenes in the show.
I am thankful I had my website because the request came in from my website before Etsy, which is which is pretty dead at this point because it is littered with crafters that sell their work dirt cheap. I am thankful I took the request seriously and I have a husband who is lightning fast at research online and designing bang-up websites with rockin’ SEO. The prop master was a super person and a delight to work with. Watch for my silver and amethyst ring, as seen on TV!
Several months ago I emailed with a client about a stone he had from his father he acquired many years ago. He had a wonderful lady friend and he wanted me to create a custom piece using the emerald cut citrine he would send to me. I told him I would be glad to create something.
I received the stone and was amazed at the color and clarity of the citrine gem. It was large and needed a substantial setting to insure it would be secure. Then the process began. What to do? The stone was amazing and I didn’t want the setting to interfere with its beauty. I wanted to incorporate design elements that were in keeping with my style but it needed to flow. It needed to be something different than if he had gone to a traditional commercial jeweler.
Here are some drawings I did for the client to review and determine which design he wanted me to use. I also wanted him to tell me if he had any changes to the design before I started to produce it. At this point we also emailed back and forth. He decided on the vertical setting and approved the design.
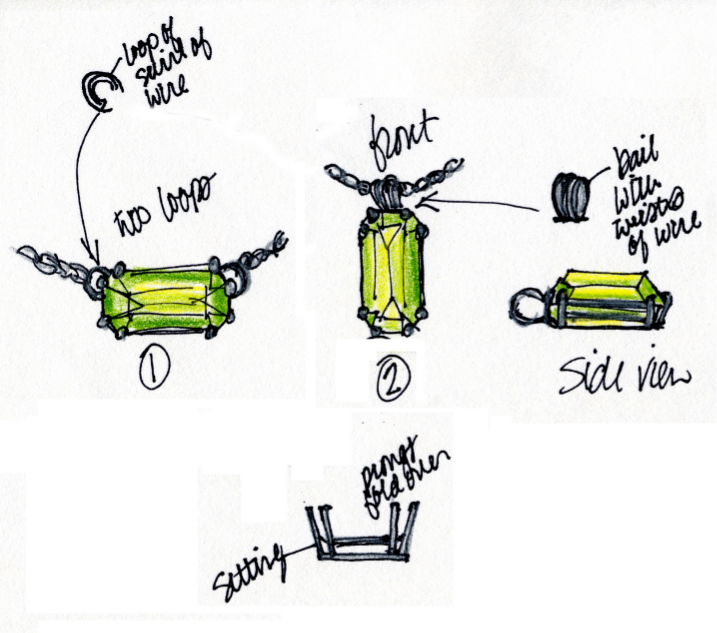
The design called for a octagonal basket setting for the beautiful citrine stone. I have to admit I stressed over the basket setting construction. It called for very exact measurements. I measured and measured again the wire I was using to construct the basket setting. There was also an issue of the angle from the top to the bottom octagon that would be created to hold the stone. Too much or too little and the prongs would not hold the stone well. John Cogswell’s Creative Stonesetting was incredibly helpful in this portion of the project. I honestly formed at least 5 different octagons in silver before it was right.
Citrine with setting
It is the process, not just the finished piece. Alan (my husband) and I had this discussion while I was struggling with the perfect octagon. It is not a race to get it done but to get it right and do a good job. I had the pleasure of taking a jewelry class with John Cogswell several years ago and we made clasps. Measurement was extremely important or the clasp would not work. Alan reminded me, “That wonderful teacher you had several years ago would not be satisfied with something that would “do”. Challenge yourself to make it as perfect as you can. It’s the process…” DING! He was right.
here is the setting only
I had plenty of time to get the piece done so I methodically worked on the basket setting. Here is a photo of the basket setting in progress. Once the basket setting was done I needed to add the bail. This was a process too.
here is the setting from the topHere is the setting with the bail attached.
How to incorporate my style–but do it for a reason? The different wire look that is random in its final form but actually well thought out. I really like this part of design. My high school art teacher used to call them happy little accidents. Some jewelry designers are very exacting in all they do but I like a partnership with the materials. The torch and the silver work with you and the solder to create a one of a kind piece. I like a little randomness. Above is the setting with the bail prior to the application of the patina and the stone being set.
finished pendant with stone set and patina
Finally, here is the finished piece minus the chain.
Next question is how to wear the piece. I thought of silk cord. It needed to be something that visually carried the weight of the larger stone but didn’t make it too much. I chose a sterling silver chain.
finished piece with the chain
Here is the piece the night before it headed out the door to my client. Unfortunately the photo was done in haste (It’s the process…) and is a little blurry but you certainly can see the beauty of the stone and my solution for a necklace.
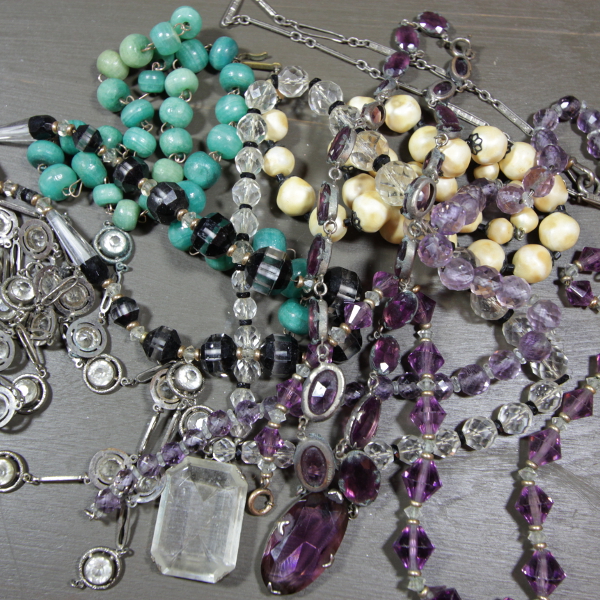
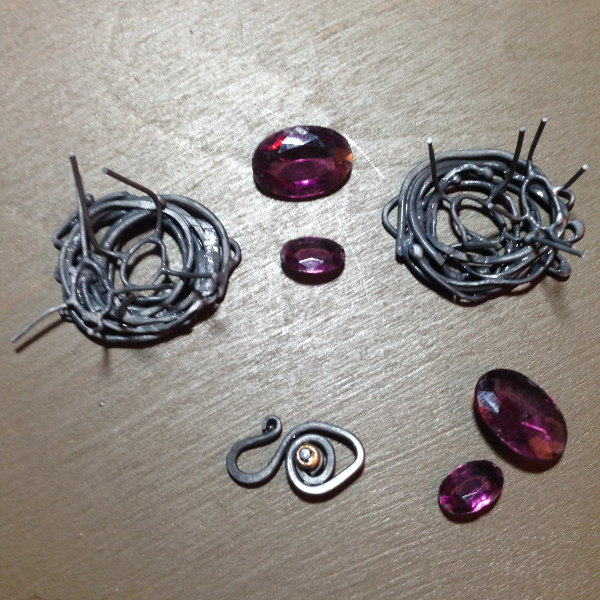
A while back a friend and colleague asked me if I could work with existing jewelry to create a new piece. She explained her Aunt Gertrude, a petite little lady, had items that were too small and just not something she would wear. She loved her aunt and wanted a piece designed from the various parts of jewelry. These are the pieces I was sent.
What to do, what to do? I took a picture of the various pieces in different combinations. That didn’t quite do it so I “deboned” the pieces. Taking them apart to look at the items as individual units. One thing she did say was she wanted a combination of all the pieces if possible.
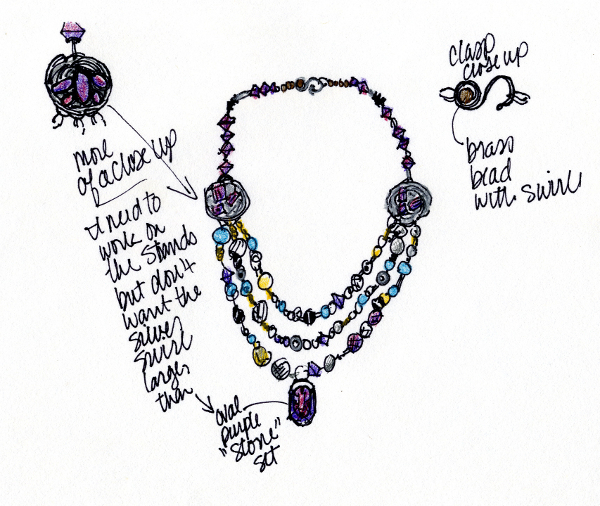
I thought of my style. I looked at the pieces and did a sketch for her to approve. She was very pleased with the sketch and I was on my way.
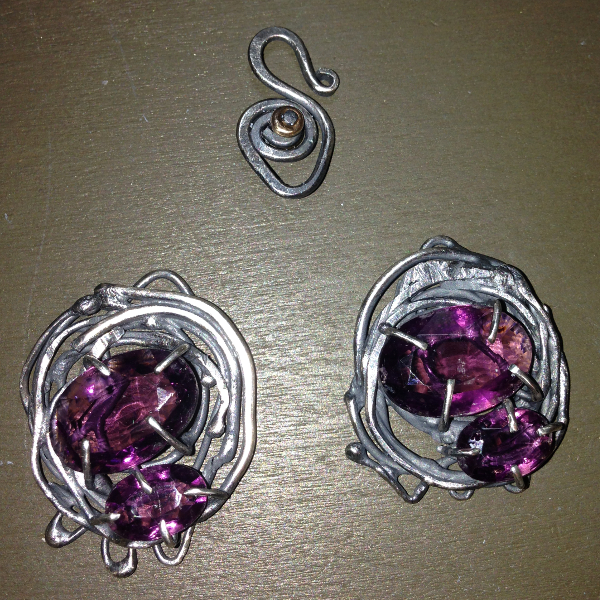
First I made the medallions that hold the three strands of beads and connect the necklace part. I used “stones” that were in bezels that had seen better days. I also made the clasp with one of the brass beads on either side riveted to the clasp.
I strung the beads in random size and order in three strands. The top part that attached to the necklace part is wire wrapped beads and the one style of bead that I had not used in the three strands. The “jewel” that is the focal point was kept in tact in the setting.
What has been created is a unique and contemporary piece that utilized Aunt Gertrude’s jewelry. I was able to present the piece to Virginia in person. She was extremely happy with the necklace and now wears it proudly with fond thoughts of her Aunt Gertrude.
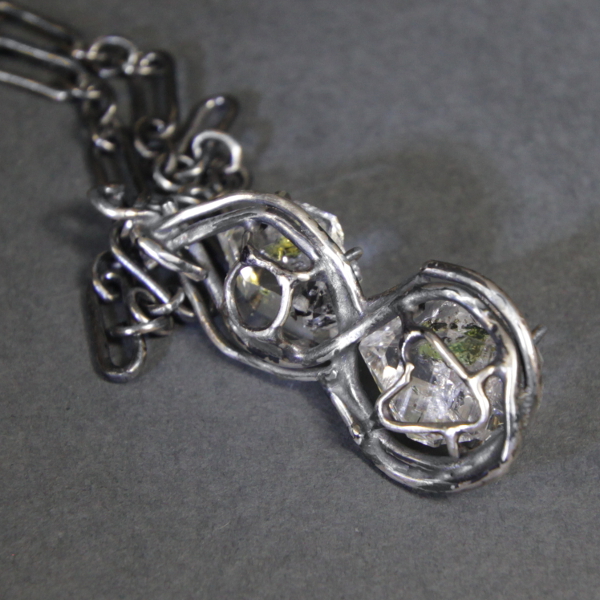
These two stone were selected on a trip to London. I fell in love with these two stone. I just couldn’t choose which to get so I purchased both with no clear design in mind. The stones are really stunning and if you look carefully you can see little bits of citrine encased in the stone. Funny thing is, looking up the stones and where they are found it is Herkimer, NY. All the way to London to find these little beauties.
In my style and design I wrapped the two stones in sterling silver with a self bale. I have created this piece for myself but wanted to share it with those of you who have found the website. The chain is a purchased chain that enhances the organic design of the piece. I have added a special touch to the back incorporating a heart and a circle.
If you have a special jewel or something that is special to you for a sentimental reason please feel free to contact me. I’d love to talk to you about your ideas. I have a commission from a dear friend who wants me to create a piece or pieces with her aunt’s costume jewelry. I will post that progress on future posts.
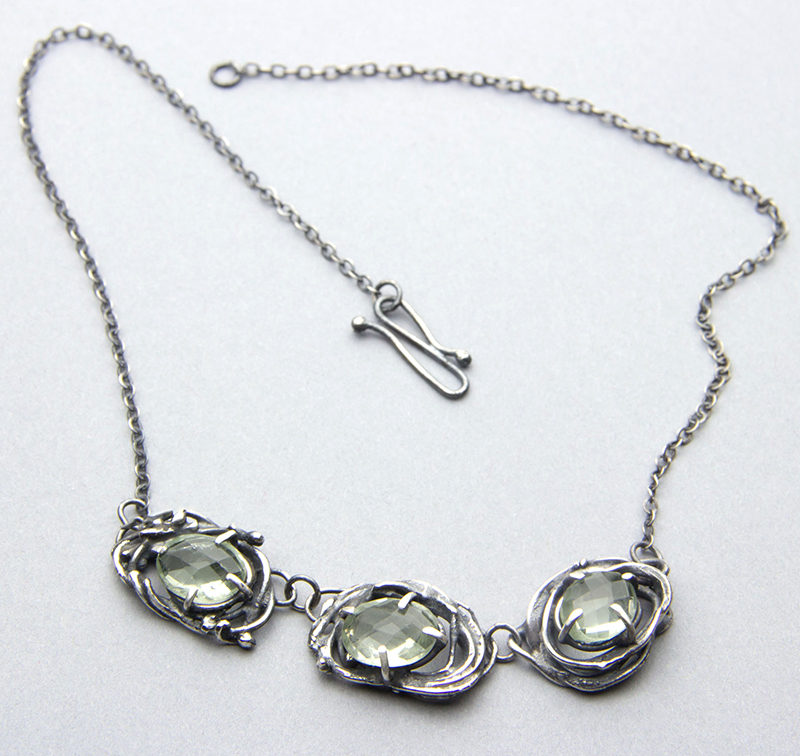
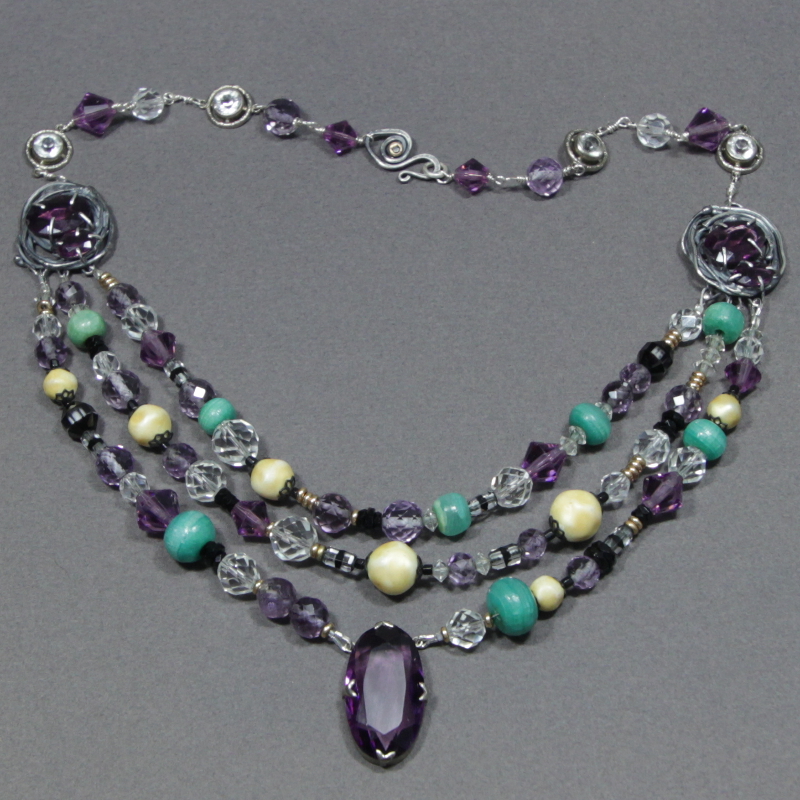
This is the finished necklace for my client. She received it several weeks ago and really likes it. I am very pleased with the finished necklace. It has a nice balance with the faceted stone and the random silver nest. If you have an idea or see something that you like but would like it a little different please feel free to contact me.
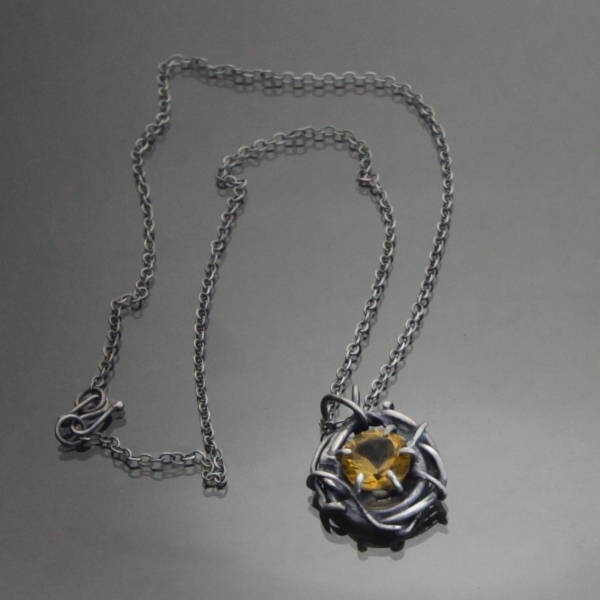
A person had seen a few posts of my Facebook and asked if I could create a custom piece that would utilize several stones. She mentioned the thought process for selecting the specific stones. After reviewing the reasons for the selection and doing some research, I suggested one stone–citrine. We spoke a little further and I felt that the piece would be best with a facet-cut stone rather than a rough or tumbled stone. I did a drawing of the design and she agreed this was what she wanted. The stone was ordered–a 10mm facet cut citrine.
Below are some photos of the necklace in different stages:
pieces to be put together for the necklace
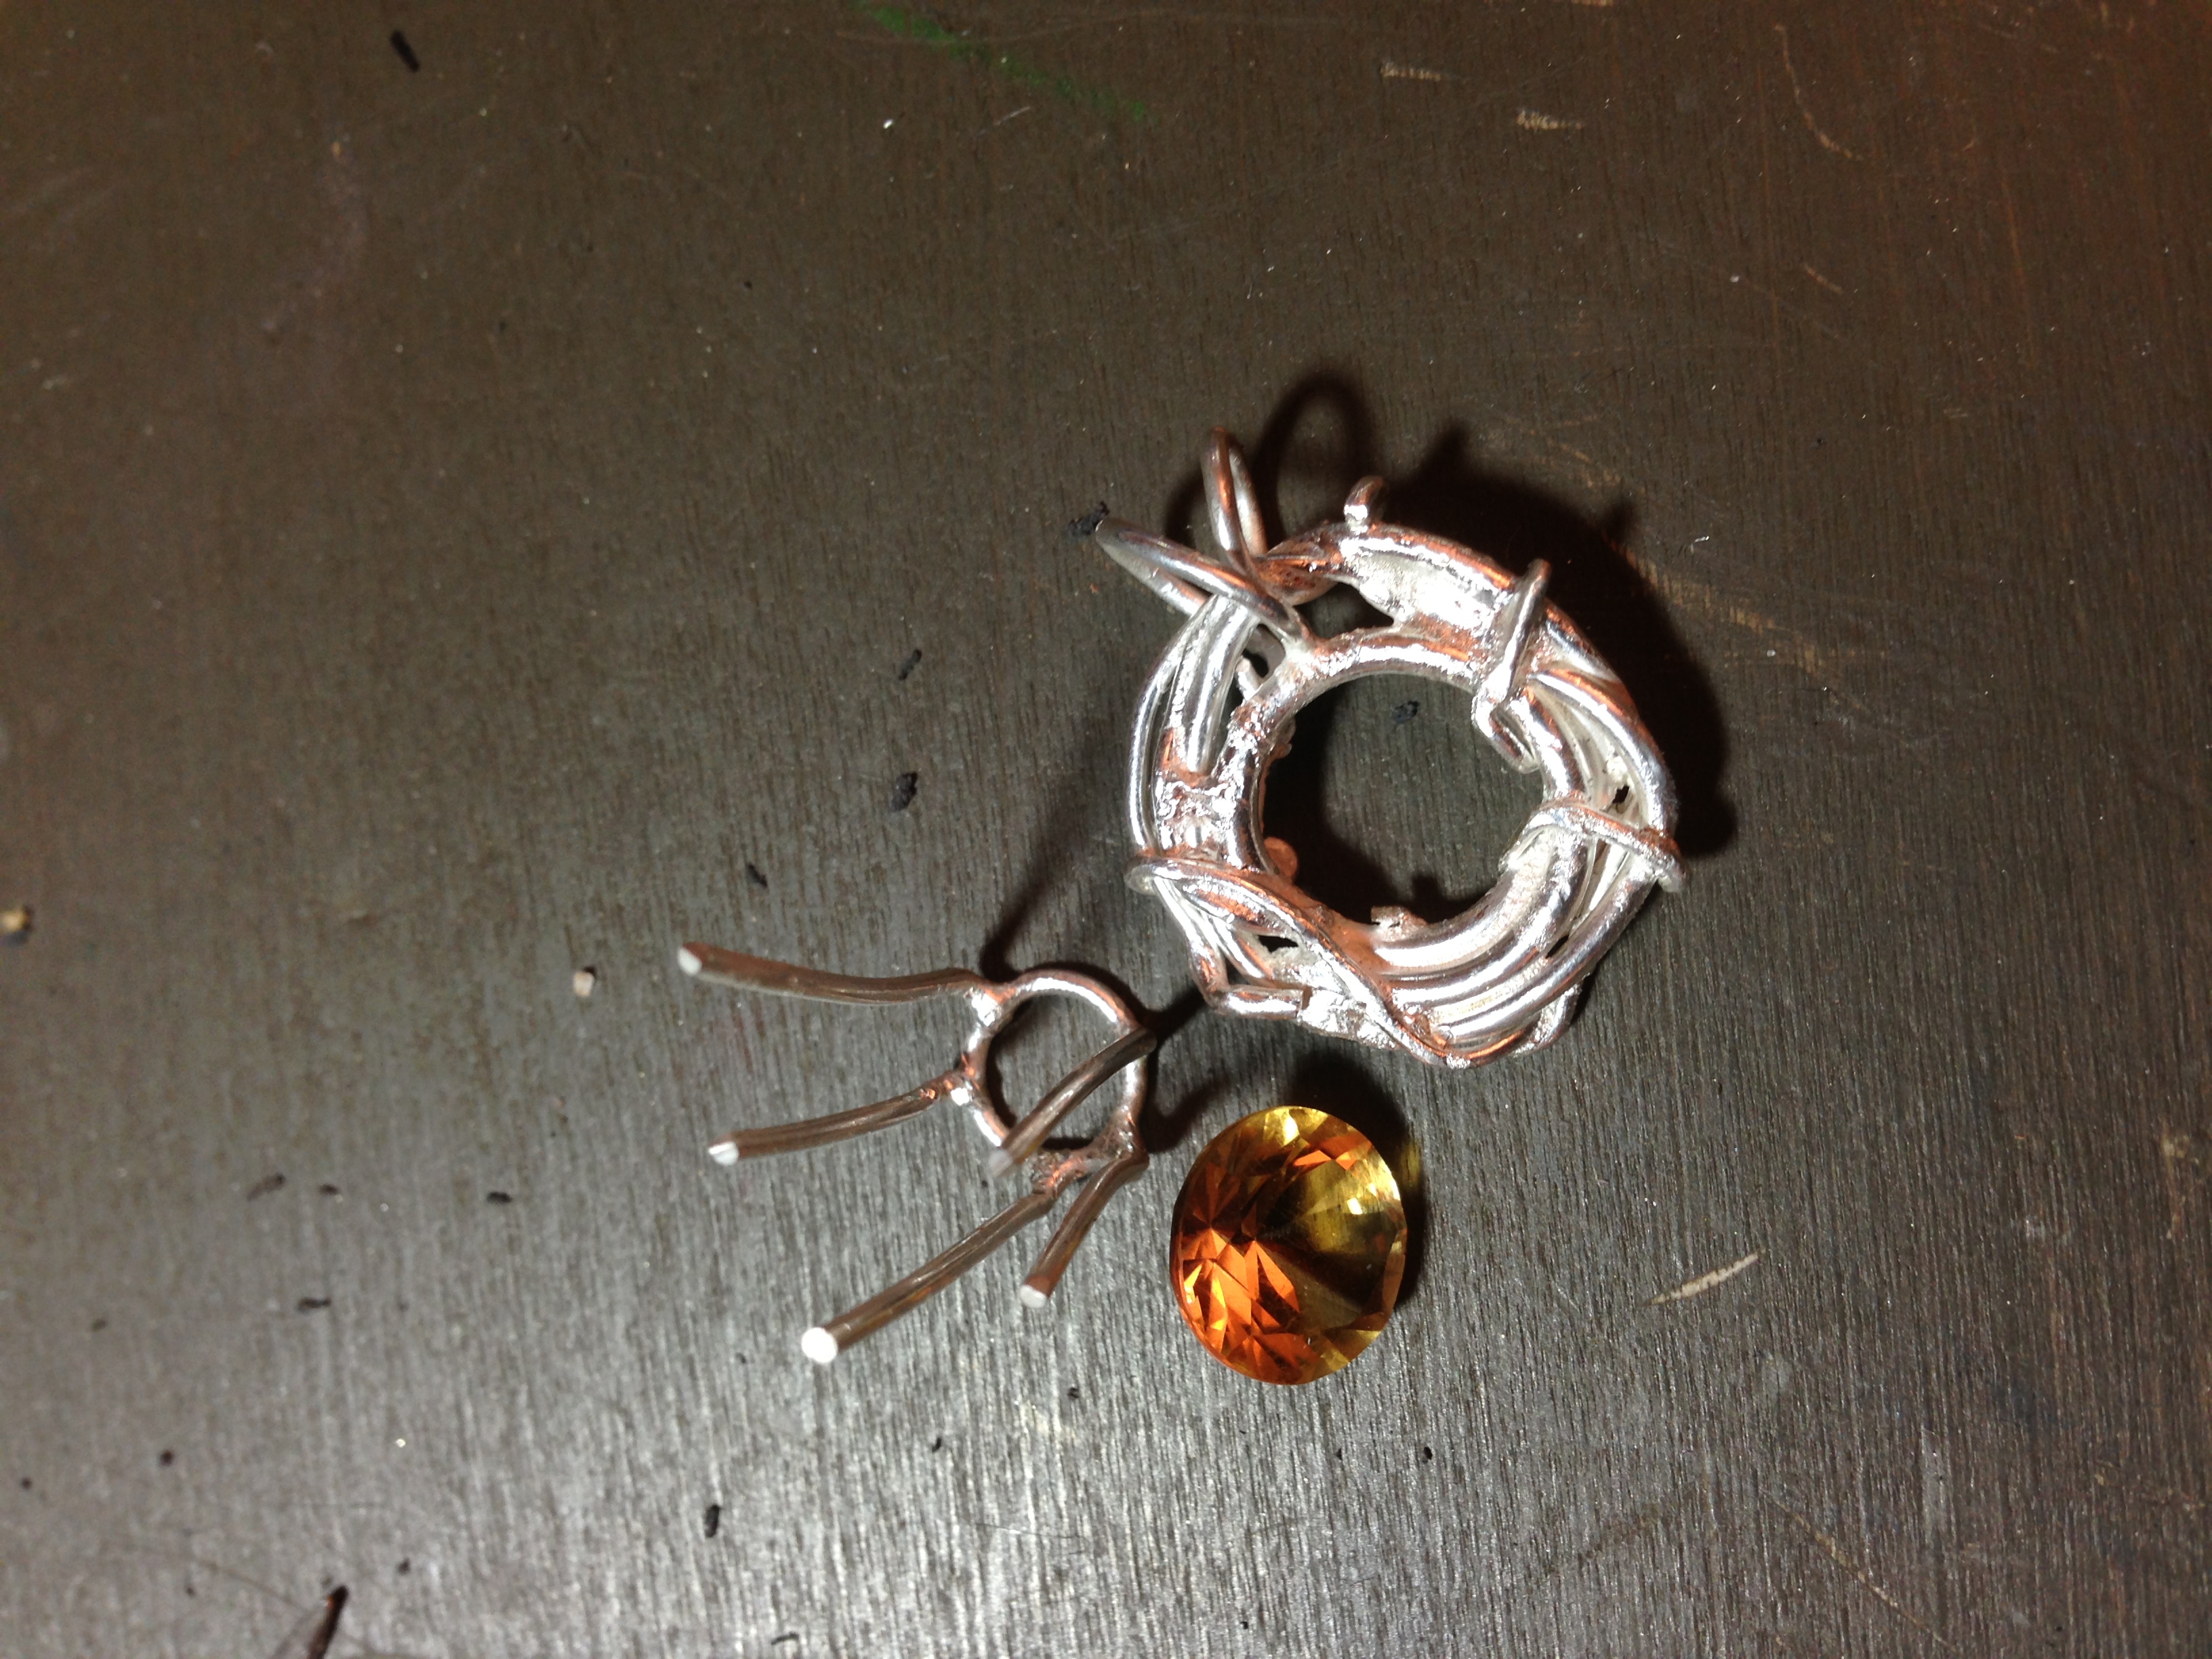
Here are the three main components of the necklace. The wreath looking piece is created from 20, 18 and 16 gauge sterling silver wire. It was wrapped around a mandrel and woven together. I then soldered the wires together to create a solid piece. All randomly placed wire, but reviewed for visual balance. A bail was made in the same random but controlled style with 18 gauge wire. You will notice the setting for the citrine separate from the decorative part that surrounds the setting and the placement of the stone.
Pictured is the soldered setting in the decorative piece. The citrine is along side.
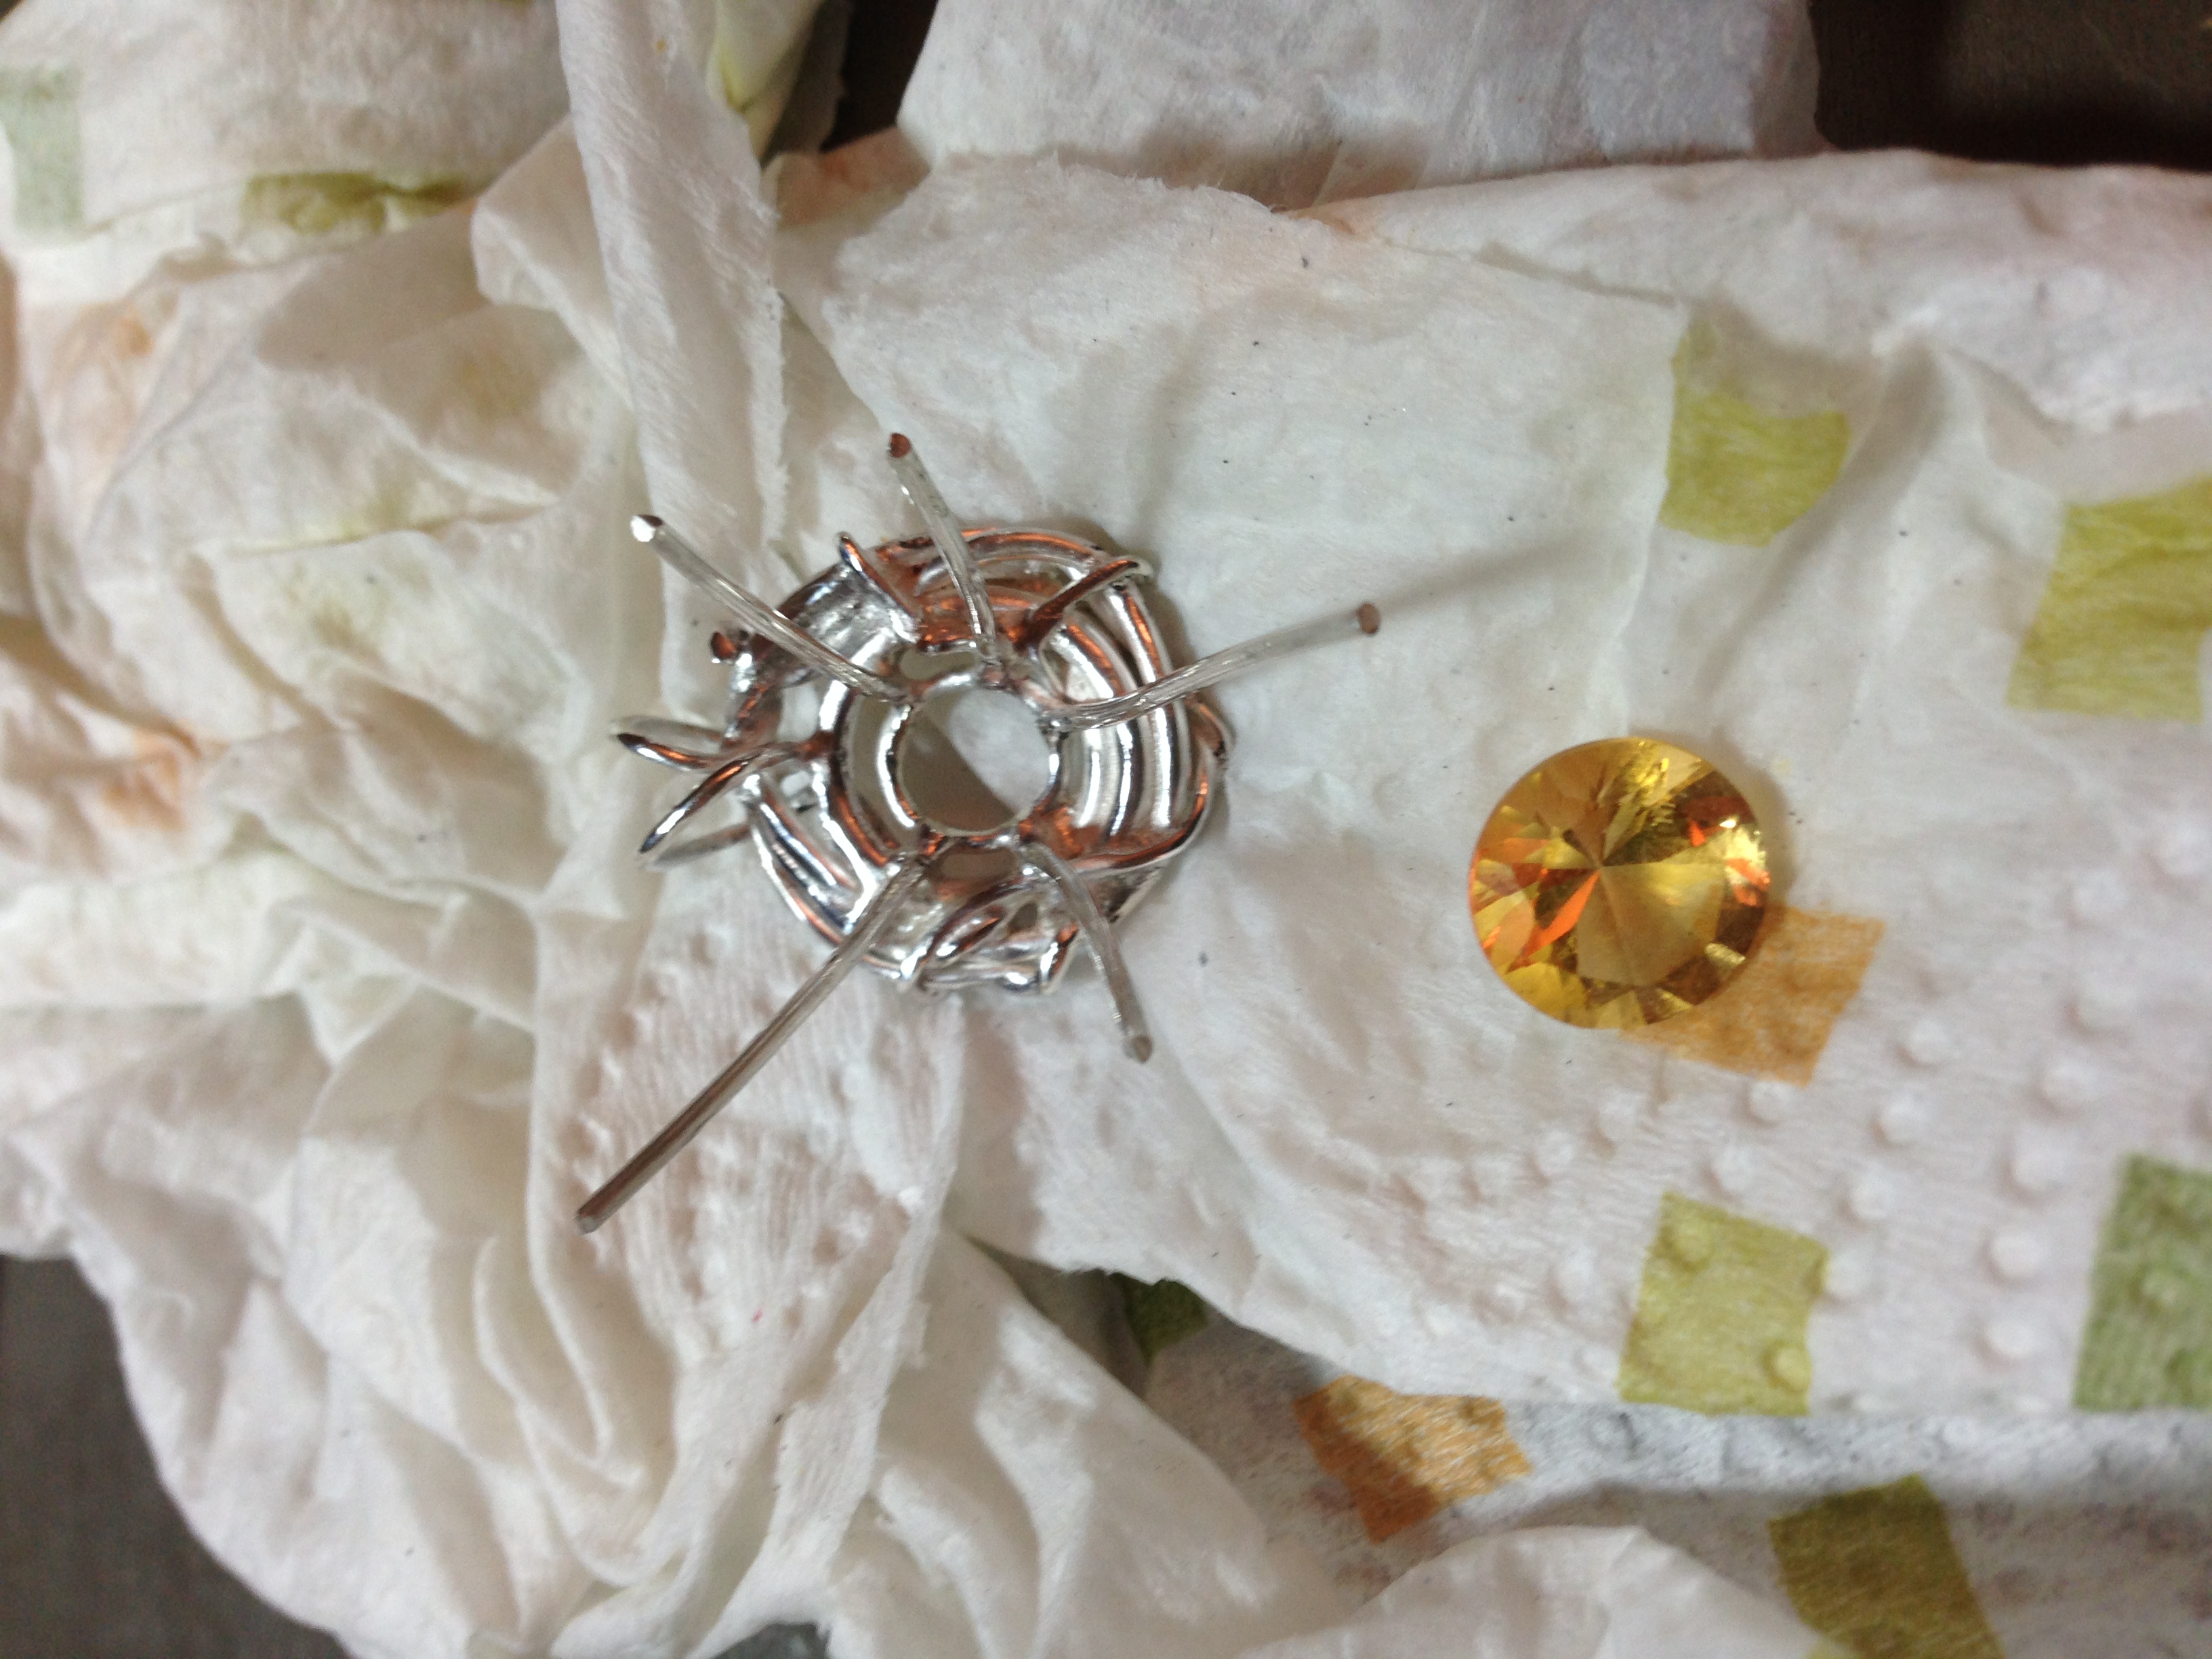
The next photos is of the setting, now soldered into the decorative piece with the bail. The 10mm citrine is next to the setting. You will notice the prongs are very long and will not be trimmed until the piece is cleaned up and the stone is ready to be set. With this style of piece it is great that it looks random and organic but it is important to spend the time to finish the piece carefully and completely because the next step is to patina the piece and set the stone. Once the stone is in, it is difficult to clean up so the wreath piece was cleaned and polished to make sure there are no rough edges and anything that is not appealing is addressed prior to the setting having been soldered in place. Then the piece is cleaned and adjusted so the stone will set properly.
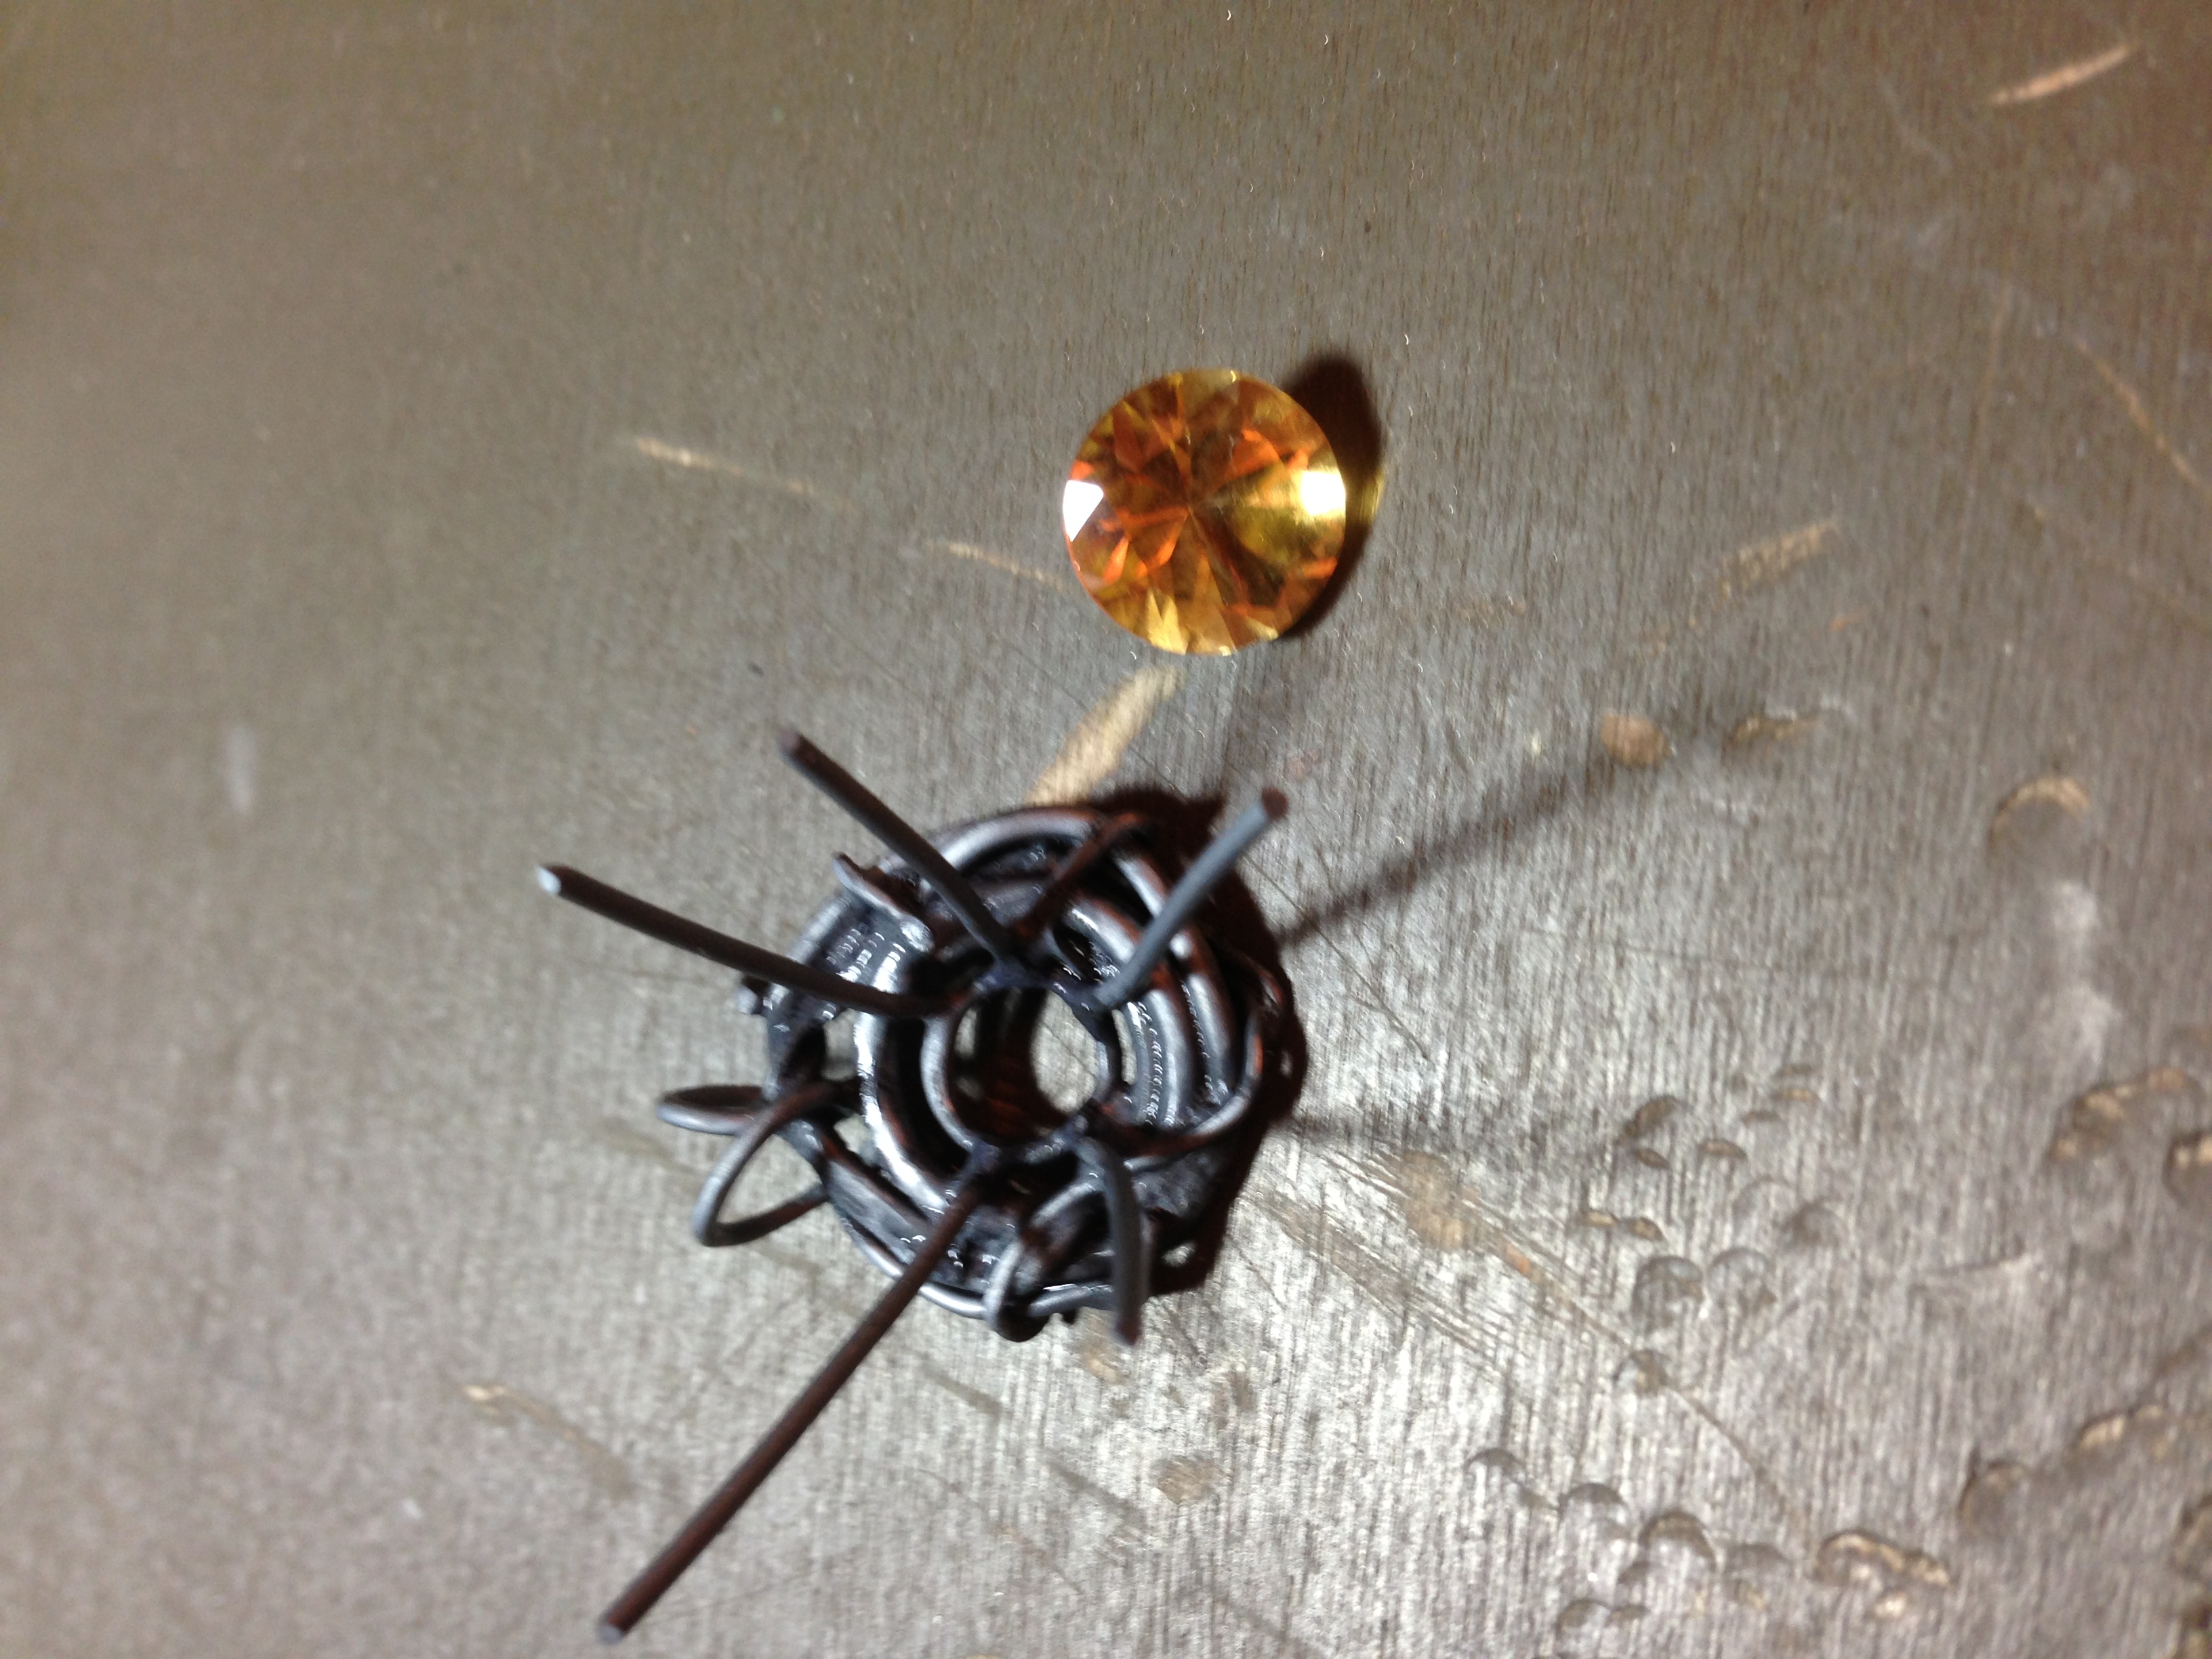
The setting is finished and cleaned up. It then has been had a patina applied. Steel wool will be used to rub off some to give the piece depth and visual dimension. Then it will be ready for the stone to be set.